Thank you for purchasing the Wagner Diagnostic tool. Please follow this guide for installation / setup and troubleshooting.
1. Step 1 – Installing the drivers
The software you will need is included on the CD-ROM inside the DIAG 4 box. Should you not have a CD
ROM drive you can visit https://oc1.wagner.de/s/rHnQyzeykCYs3Db
Password for access is : Cmn77m8FXc
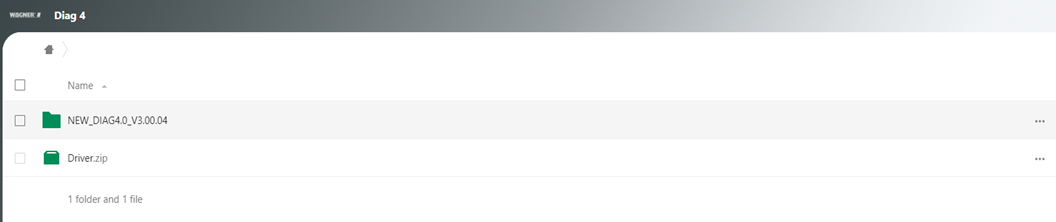
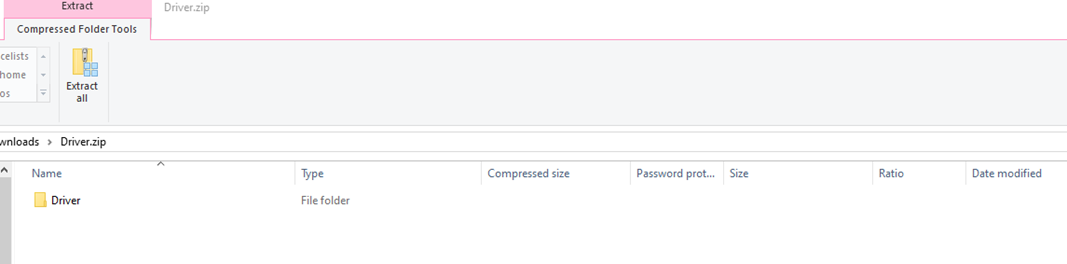
From the link you will find 2 folders, download the zip file and then open the folder as below
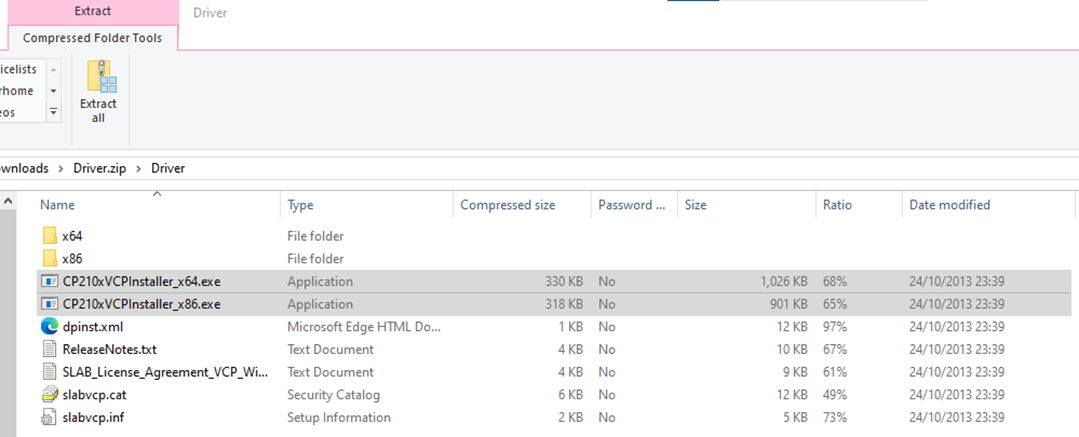
Once this file is open you will find 2 drivers labelled CP210xVCPInstaller.
Select either _x86 or _x64 depending on what version of Windows of you are running, to find whether you are running a 64bit (x64) or 32bit (x86) please follow the below guide.
Windows® 10 or above
1. Right click the Windows icon in the lower left corner and select system from the list
2. Under device specifications the operating system is listed as follows:
For a 64-bit version operating system: 64-bit operating system, x64 based PC appears under system type.
For a 32-bit version operating system: 32-bit operating system, x86 based PC appears under system type.

Select Run and follow the instructions to install the drivers
2. Step 2 – Installing the main program
Once the driver installation is complete open the Diag 4 folder and download the Setup.exe file


Follow the instructions to install the Diag 4 Software.
3. Step 3 – Running the DIAG 4 program.
Click the new DIAG 4 desktop icon that was created during installation of the main program.
A new window will open, you may have a language selection screen during this time, if the language is incorrect this can be changed via the settings tab at the top followed by the second option down language.
 Figure 3 - Settings / Interface options
 In the image above you will also see the interface option, if communication with the Wagner aspirator is not
working please make sure to select the correct communication port via this setting as shown in the image
below (Correct port number is unique to computer / USB port).
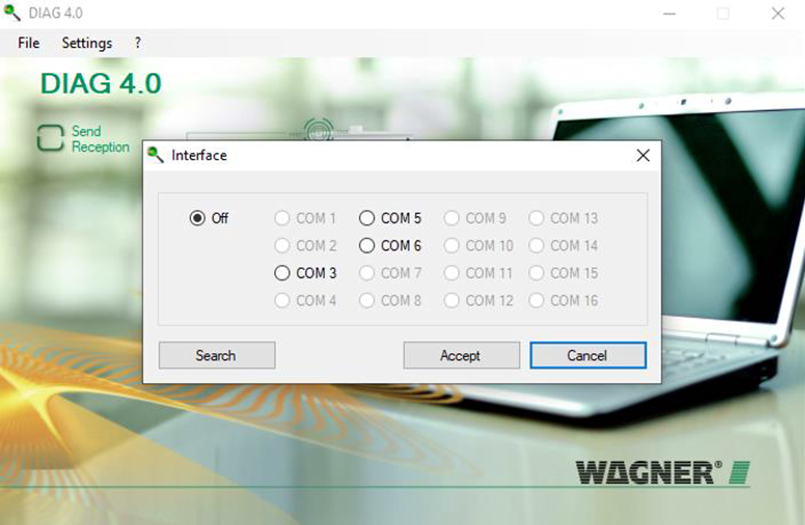
Figure 4 - Communications port selection
To ensure the correct operation of the DIAG 4 tool please check the bottom of the diagnostic tool for a green LED whilst the program is open (as shown below).

Figure 5 - Active LED
The LED indicates that the drivers have been installed correctly, if no LED is present please double check your operating system version and re-install the drivers.
4. Step 4 – Connecting to a Wagner Unit
Micro-Sens
The DIAG 4 tool comes with a leather pouch and a strap for mounting to a Micro-Sens unit.
The communication to a Micro-Sens unit is achieved via Infra-red technology for this reason the correct
mounting position is required for communication to be established (see below image).

Figure 6 – connection to a Micro-Sens unit.
Once the correct port number is set the Reception and Send boxes should flash Red – Yellow – Red - Yellow etc. Once connection is established the Reception box should briefly turn Green. The image below shows both these indications at the same time to demonstrate their respective positions (as indicated by red arrow). If the communication is not working the send box will flash Red and the Reception box will remain blank.
 Figure 7 – Software communication status indicators
If the communication is not working, please double check the correct position of the DIAG 3 unit on the Micro- Sens and your communication port settings. If the DIAG 3 will still not connect after this please contact us for further technical support.
Once a successful connection has been established a new window will load showing a sequence of scrolling numbers before opening up the main status page (shown below).
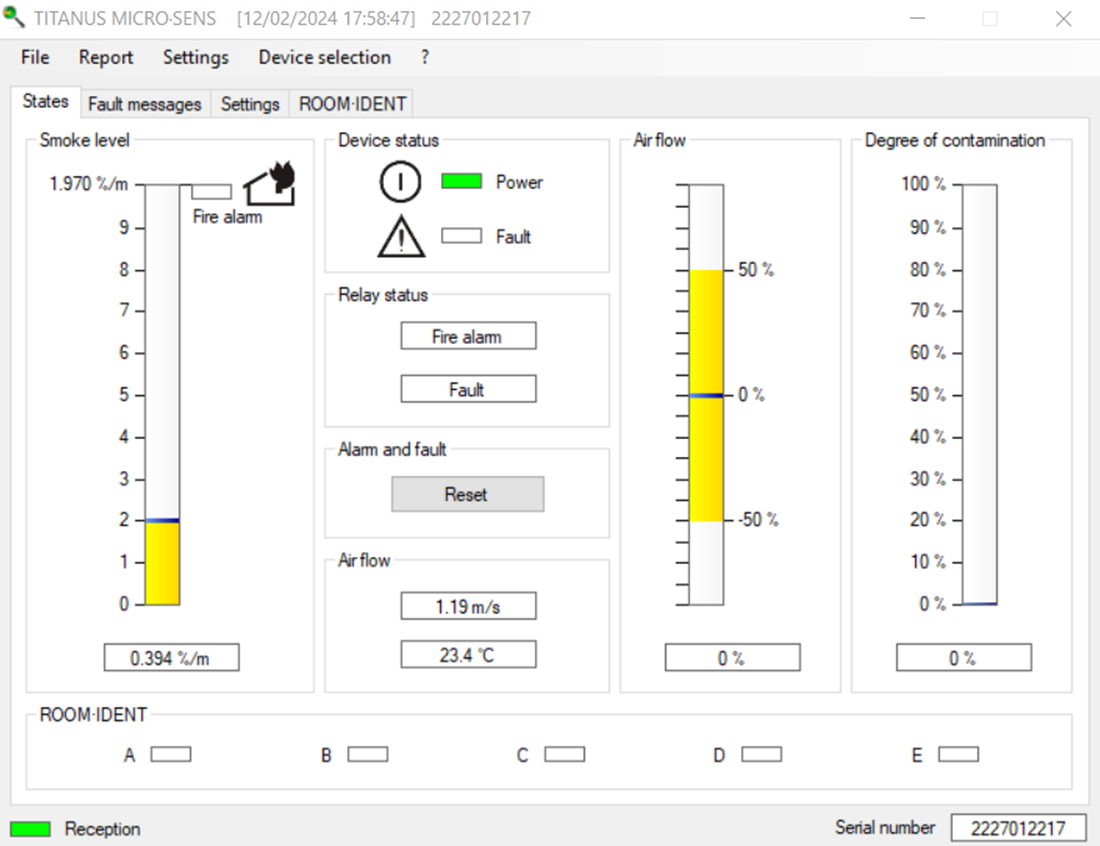
Figure 8 - Main status page after a successful connection
Step 4 (Cont.) - Connecting to a Wagner Unit Pro-Sens / Top-Sens
Connection to a Pro-Sens / Top-Sens is not made via infra-red functionality and as such the unit does not need to be strapped to the front. Included in the DIAG 3 box is a ribbon cable that connects from the top of the DIAG 3 unit for plugging into the Mainboard of the Pro-Sens / Top-Sens.
 Figure 9 - DIAG 3 Pro-Sens / Top-Sens connection cable (left) and cable shown connected to DIAG 3 (right).
DIAG 3 should be connected to the Pro-Sens / Top-Sens via port X2 which is located between the detector ribbon cable ports as shown in the image below.
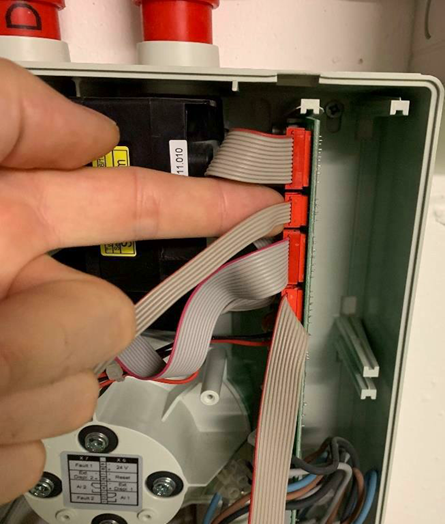
Figure 10 - DIAG 4 connection to a Pro-Sens unit
Once the DIAG 3 unit is connected, DIAG 4 software may be opened and the connection procedure as detailed
on page 6 should occur.
If there is no communication please follow these troubleshooting steps:
1. Check green LED is illuminated on the bottom of the DIAG 3 tool.
2. Check the communication port is correctly selected under the interface tab of the DIAG 4 software.
3. Make sure the cables are in good visible condition and replace any damaged cables.
4. Push and hold the red connector end of the lead to the board whilst you open the software (as shown in image below), if the unit connects there is a loose connection with the ribbon cable and this should be replaced.
 Figure 11- DIAG 3 faulty ribbon cable plug test
5. If after confirming all of the above then please proceed to try the DIAG 3 unit on an alternate unit, if
connection occurs the issue is most likely caused by the detector and this should then be replaced.
Please note there are two different versions of DIAG 3 devices, ones sold before 2016 use a different connector design part number : AD-05-0575
Newer cables sold after 2016 use cable as shown below, part number : AD-05-0576
 Figure 12 - New DIAG 4 plug & port
Wagner DIAG 3 software has been designed to be used on Windows® operating systems only, Windows® operating systems pre-dating Windows® XP™ are not supported.
All parts come covered by a standard one year manufacturer’s warranty which excludes damage caused by incorrect usage.
If you have any questions or queries not covered in this guide please do not hesitate to contact us on 0370 333 6116 where we would be happy to assist you further.
Once again thank you for your purchase and we hope you enjoy using your Wagner product.
Disclaimer
All product and company names are the trademarks™ or registered® trademarks of their respective holders. Use of them does not imply any affiliation with or endorsement by them.
Windows® is a registered trademark of the Microsoft Corporation.
All third party trademarks (including logos and icons) referenced by Wagner UK in this guide remain the property of their respective owners. Wagner’s use of third party trademarks does not indicate any
relationship, sponsorship, or endorsement between Wagner and the owners of these trademarks.
Any reference by Wagner to third party trademarks is to identify the corresponding third party goods and/or services and shall be considered nominative fair use under the trademark law.
Was this article helpful?
That’s Great!
Thank you for your feedback
Sorry! We couldn't be helpful
Thank you for your feedback
Feedback sent
We appreciate your effort and will try to fix the article